If you want to write your WordPress posts offline (i.e. in a separate editor to the WordPress editor), then you may find you have to spend a fair bit of time reformatting the blog post to add any required WordPress formatting before you can publish.
There are lots of reasons for wanting to write your WordPress blog posts offline. You may not have access to the internet at the time you are writing. You may find the WordPress editor to be a pain, or maybe you have another editor that you’d much rather write with.
I like writing using Word 2007 so I created some VBA macros which allow me to add bits of formatting to the post (titles, links, photos) faster than I could do manually.
These macros help you format posts which are meant to be pasted into the WordPress non-WYSIWYG post editor. I don’t know what would happen if you pasted posts formatted with these macros into the WordPress WYSIWYG editor.
Description of WordPress macros
Here’s a description of the macros from the source code at the end of this post. I’m only describing the main macros, not the other supporting functions in the code that these macros need.
BoldForWordPress – Adds ‘Strong’ tags around the highlighted text and also makes the text bold in Microsoft Word to make the titles easier to see when you are editing your blog posts.
BoldForWordPress
Will be turned into:
<strong>BoldForWordPress</strong>
PhotoLinkSite1 / PhotoLinkSite2
Changes the image name into an image link with just a few bits for you to fill in to complete the HTML. It will try to auto generate an ALT tag from the image name by turning any hyphens ‘-‘ into spaces. Highlight an image name such as ‘myimage.jpg’ and click the image button.
wordpress-blog.jpg
Will be changed into:
<img src="http://www.????.co.uk/data/2010/xxxx/wordpress-blog.jpg"
 width="" height="" alt="wordpress blog" />
If you have multiple sites then you can use the template code in PhotoLinkSite1 / PhotoLinkSite2 to allow you to create links which already contain each of your sites URLs. If you only have one site then just delete PhotoLinkSite2.
Listify
Listify will convert a number of lines of text into a HTML list.
Item 1
Item 2
Item 3
Will become:
<ul>
    <li>Item 1</li>
    <li>Item 2</li>
    <li>Item 3</li>
    <li></li>
</ul>
The code will give you an extra list element at the end in case you want to add more items to your list. If you don’t want it just delete it.
Link
Highlight some text or a URL and this will create your <A HREF… link. If you highlight text beginning with ‘http’ then it will put the text into the link section, otherwise it will put it into the description section.
This is some text
Will become:
<a href="">This is some text</a>
And:
http://www.advancedhtml.co.uk/
Will become:
<a href="http://www.advancedhtml.co.uk/"></a>
SpacingTable
This will insert a piece of fixed HTML which can be used to add extra spacing to images or Amazon iframes. See my post Adding spacing round an iframe in WordPress for more information. If you select the iframe HTML the spacing table will be put around it. If you have nothing selected then the spacing table will just be inserted straight where the cursor is. This is what will be inserted:
<table border="0" cellspacing="10" align="right">
 <tr><td></td></tr></table>
AdSense
This macro is useful if you use the Adsense Injection plugin. Press it once and it will insert a tag to disable AdSense in the current post. Press it again and you will get the tag to start the AdSense from a certain point in your post. Here are the two tags it will insert.
<!--noadsense-->
<!--adsensestart-->
Splitter
This inserts a line of hashes and asterisks into the text. This isn’t useful for the WordPress blog post, but I use it to split up sections in the Word document when I’m writing multiple posts. This is what this macro outputs:
*#*#*#*#*#*#*#*#*#*#*#*#*#*#*#*#*#*#*#*#*#*#
How to create and configure the toolbar buttons
Here are some brief instructions for how to setup these macros. You’ll need the source code below.
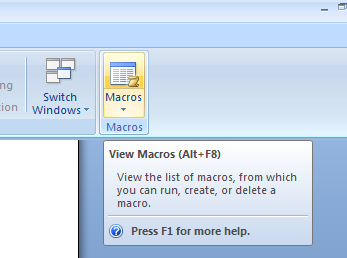
First click on the ‘View’ tab and then the ‘Macros’ button on the right hand side of the ribbon.
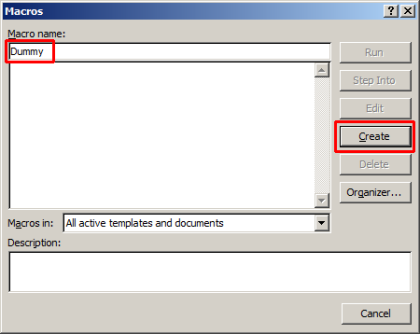
If you haven’t added any macros before you’ll need to create a dummy one so you can access the Visual Basic macro editor. Type in ‘Dummy’ as the macro name and press ‘Create’. You’ll be taken straight to the editor.
Paste all the macro VBA source code below into the editor. Save the macros by going to the File menu and pressing ‘Save Normal’.
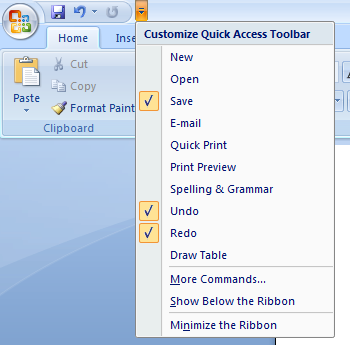
Now you need to create some buttons and link them to the macros. Click on the little down arrow (pictured below) to get the Customize Quick Access Toolbar menu. Press ‘More Commands’.
In the ‘Choose commands from’ pull down list select ‘Macros’.
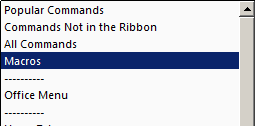
Now click on each of the macros and then press ‘Add’.
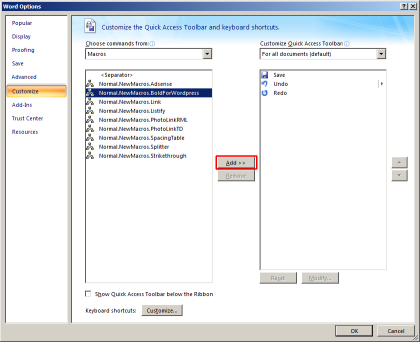
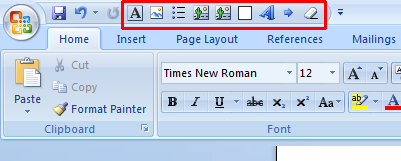
To give each macro a unique icon, click on each on in turn, press ‘Modify’, and then choose your icon.
![]()
You should now have your macro buttons setup and it will look something like this.
Visual Basic (VBA) WordPress macro source code
Here is the VBA macro code – it’s not pretty but it works. It has been tested on Word 2007. You should be able to get it working on other versions of Word as well, but it might require minor modifications if it doesn’t work as expected.
You might want to customise the URLs in PhotoLinkSite1 / PhotoLinkSite2 to fit your own blog.
Sub BoldForWordpress()
    'Wordpress bold title
    Dim TitleStr
    TitleStr = Selection.Text
    Dim HasNewLine As Boolean
    If Right(TitleStr, 1) = Chr(13) Then
        HasNewLine = True
    End If
    TitleStr = TrimNewLine(TitleStr)
    With Selection
    .Delete
    .Font.Bold = wdToggle
    .TypeText ("<strong>")
    .TypeText (TitleStr)
    .TypeText ("</strong>")
    .Font.Bold = wdToggle
    End With
    If HasNewLine Then
        Selection.TypeText (Chr(13))
        Selection.MoveLeft
        Selection.Font.Bold = wdToggle
    End If
End Sub

Function TrimNewLine(Str) As String
    'Remove newline from string
    If Right(Str, 1) = Chr(13) Then
    TrimNewLine = Left(Str, Len(Str) - 1)
    Else
    TrimNewLine = Str
    End If
End Function

Function TrimPlus(TheString) As String
    'Trim space and newline
    TheString = Trim(TheString)
    TrimPlus = TrimNewLine(TheString)
End Function

Sub Replace(FromStr, ToStr)
'Replace text in the current selection
    With Selection.Find
    .ClearFormatting
    .Replacement.ClearFormatting
    .Text = FromStr
    .Replacement.Text = ToStr
    .Forward = False
    .Wrap = wdFindStop
    .Format = False
    .MatchCase = False
    .MatchWholeWord = False
    .MatchWildcards = False
    .MatchSoundsLike = False
    .MatchAllWordForms = False
    .Execute Replace:=wdReplaceAll
    End With
End Sub

Sub PhotoLinkSite1()
Call PhotoLink("http://www.????.co.uk/2010/xxxx/")
End Sub

Sub PhotoLinkSite2()
Call PhotoLink("http://www.????.co.uk/2010/xxxx/")
End Sub

Sub PhotoLink(LinkBase As String)
    'Turn the image name into a link
    Dim PicString, AltString
    PicString = Selection.Text
    ' Remember newline
    Dim HasNewLine As Boolean
    If Right(PicString, 1) = Chr(13) Then
        HasNewLine = True
    End If
    PicString = TrimPlus(PicString)
    'Create alt text
    Call Replace("-", " ")
    Call Replace(".jpg", vbNullString)
    Call Replace(".png", vbNullString)
    Call Replace(".gif", vbNullString)
    AltString = Selection.Text
    AltString = TrimPlus(AltString)
    'Write HTML
    With Selection
    .Delete
    .TypeText ("<img src=""")
    .TypeText (LinkBase + PicString)
    .TypeText (""" width="""" height="""" ")
    .TypeText ("alt=""" + AltString + """ />")
    End With
    ' Re-add new line
    If HasNewLine Then
        Selection.TypeText (Chr(13))
    End If
End Sub

Sub Listify()
    'Add list tags to a plain text list
    Dim ListString
    Call Replace(Chr(13), "</li>" + Chr(13) + "    <li>")
    ListString = Selection.Text
    Selection.Delete
    Selection.TypeText ("<ul>" + Chr(13) + "    <li>")
    Selection.TypeText (ListString)
    Selection.TypeText ("</li>" + Chr(13) + "</ul>")
End Sub

Sub SpacingTable()
    'Add a table which puts space around Amazon
    'product links
    Dim TableString
    TableString = Selection.Text
    TableString = TrimPlus(TableString)
    With Selection
    .Delete
    .TypeText ("<table border=""0"" cellspacing=""10""")
    .TypeText (" align=""right""><tr><td>")
    .TypeText (TableString)
    .TypeText ("</td></tr></table>")
    End With
End Sub

Sub Link()
    'You can either select some plain text or a
    'URL to be turned into a link
    Dim LinkString
    LinkString = Selection.Text

    Dim HasNewLine As Boolean
    If Right(LinkString, 1) = Chr(13) Then
        HasNewLine = True
    End If

    LinkString = TrimPlus(LinkString)
    Selection.Delete
    If Left(LinkString, 4) = "http" Then
        Selection.TypeText ("<a href=""")
        Selection.TypeText (LinkString)
        Selection.TypeText ("""></a>")
    Else
        Selection.TypeText ("<a href="""">")
        Selection.TypeText (LinkString)
        Selection.TypeText ("</a>")
    End If
    'Fix up the new line
    If HasNewLine Then
        Selection.TypeText (Chr(13))
    Else
        Selection.TypeText (" ")
    End If
    Selection.MoveLeft
    'Put the cursor in the correct place so you
    'can complete the link
    Selection.MoveLeft Unit:=wdCharacter, Count:=4
    If Not Left(LinkString, 4) = "http" Then
        MoveCount = 2 + Len(LinkString)
        Selection.MoveLeft Count:=MoveCount
    End If
End Sub

Sub Splitter()
'Easily visible line for dividing posts
Sp = "*#*#*#*#*#*#*#*#*#*#"
Selection.TypeText (Sp + Sp + Sp + "*#*#" + Chr(13))
End Sub

Sub Adsense()
'For use with Adsense Injection plugin
NoAdsense = "<!--noadsense-->"
If Selection.Text = NoAdsense Then
    Selection.TypeText ("<!--adsensestart-->")
Else
    Selection.TypeText (NoAdsense)
    With Selection
    .MoveLeft Unit:=wdCharacter, Count:=16, Extend:=wdExtend
    End With
End If
End Sub